🛠️ How to Add a Digital Product (Step-by-Step for Vendors)
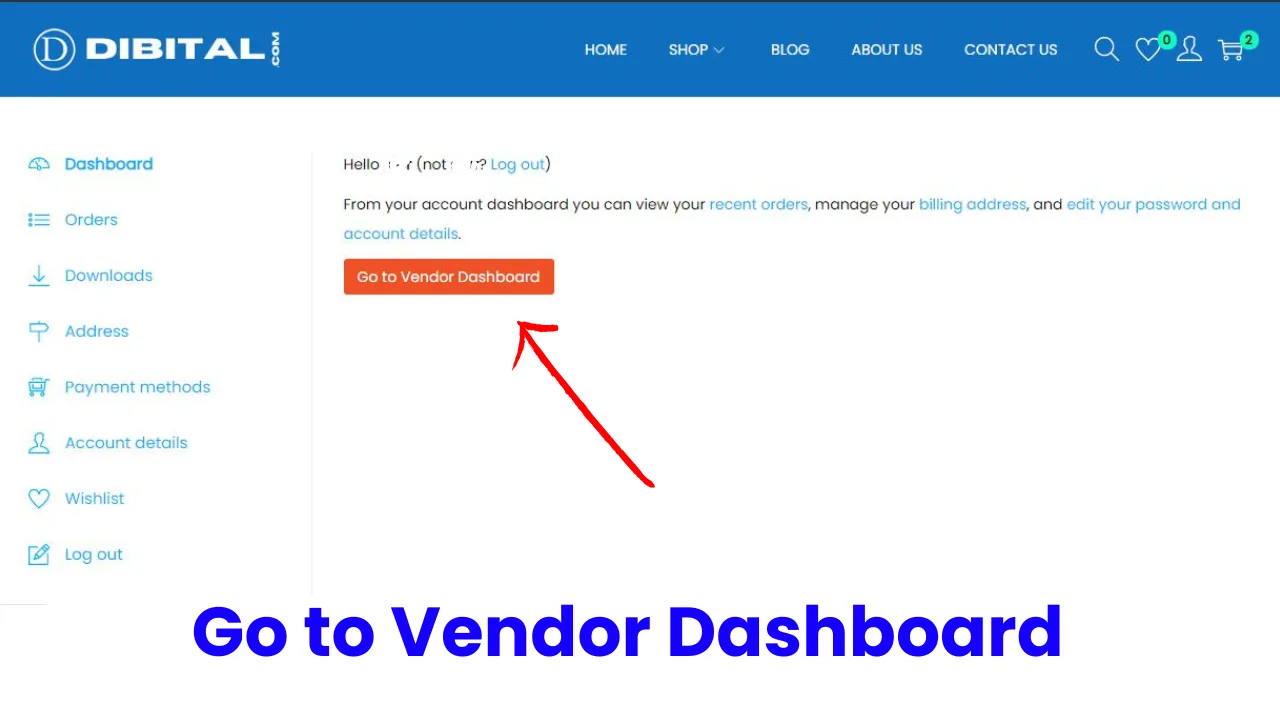
✅ Step 1: Go to the Vendor Dashboard
After logging in, click on “Vendor Dashboard” from the menu.
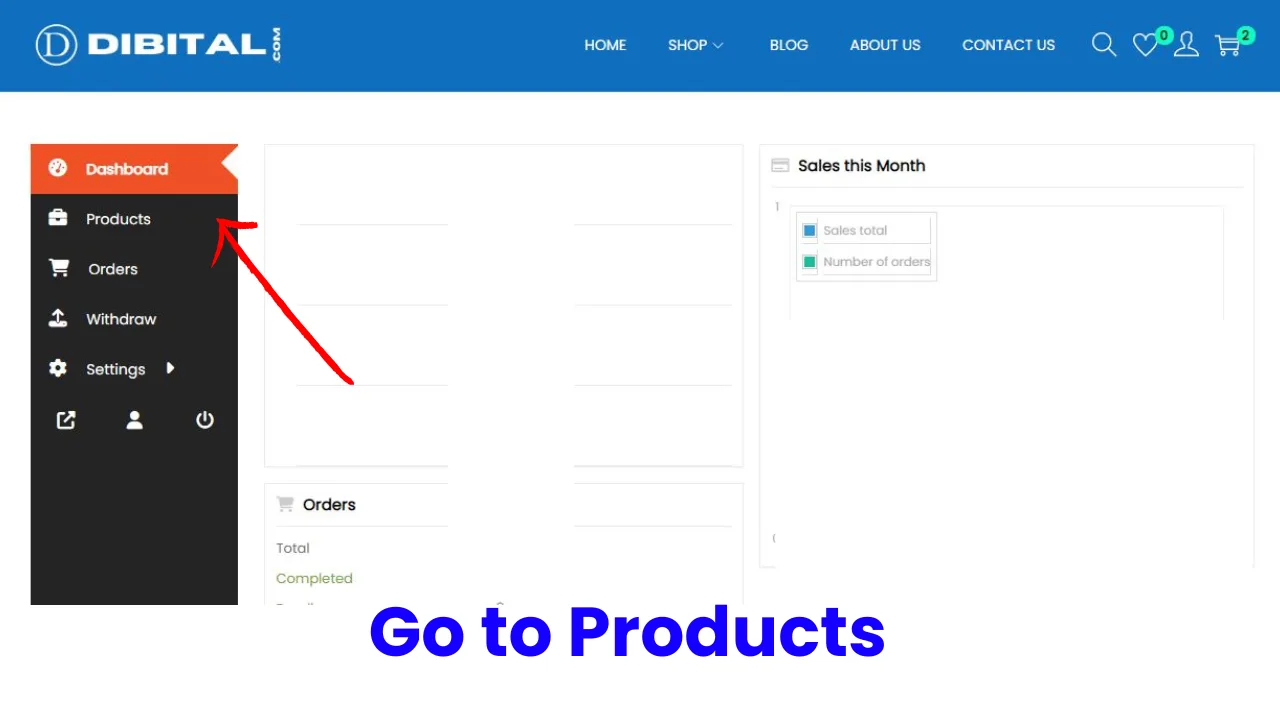
✅ Step 2: Navigate to the Products Section
In the dashboard sidebar, click on “Products.”
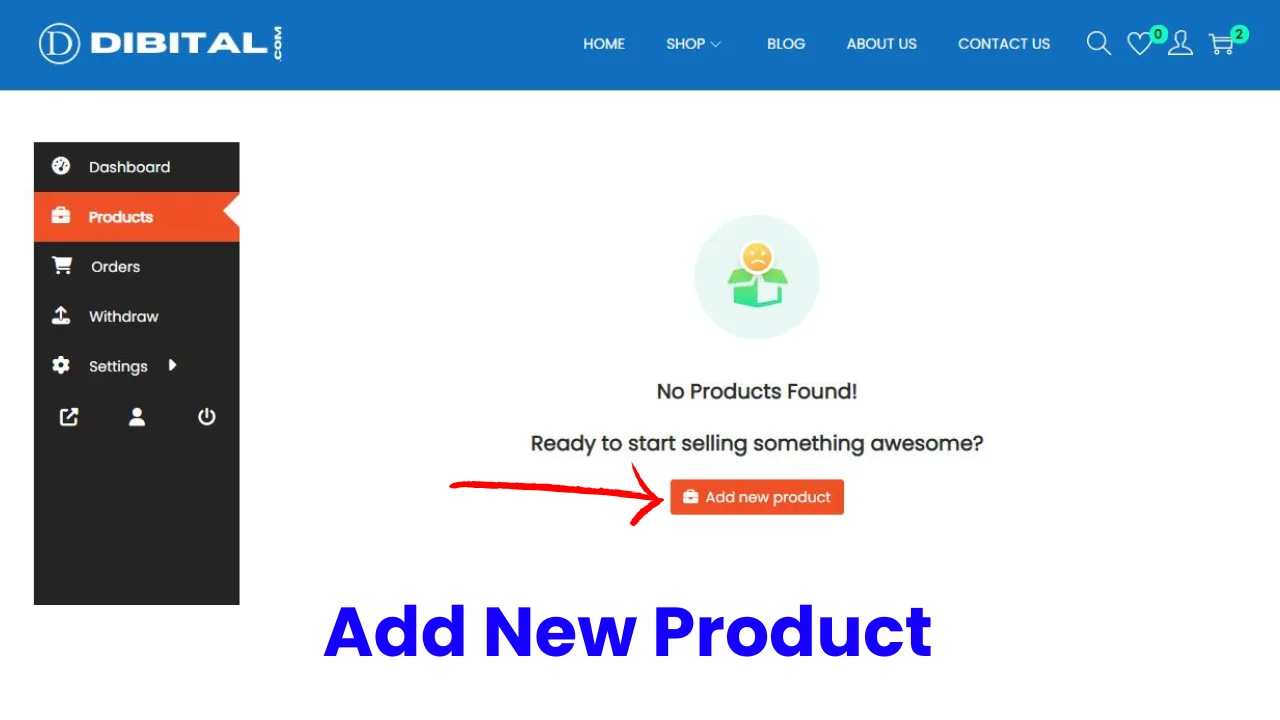
Then click on the “Add New Product” button.
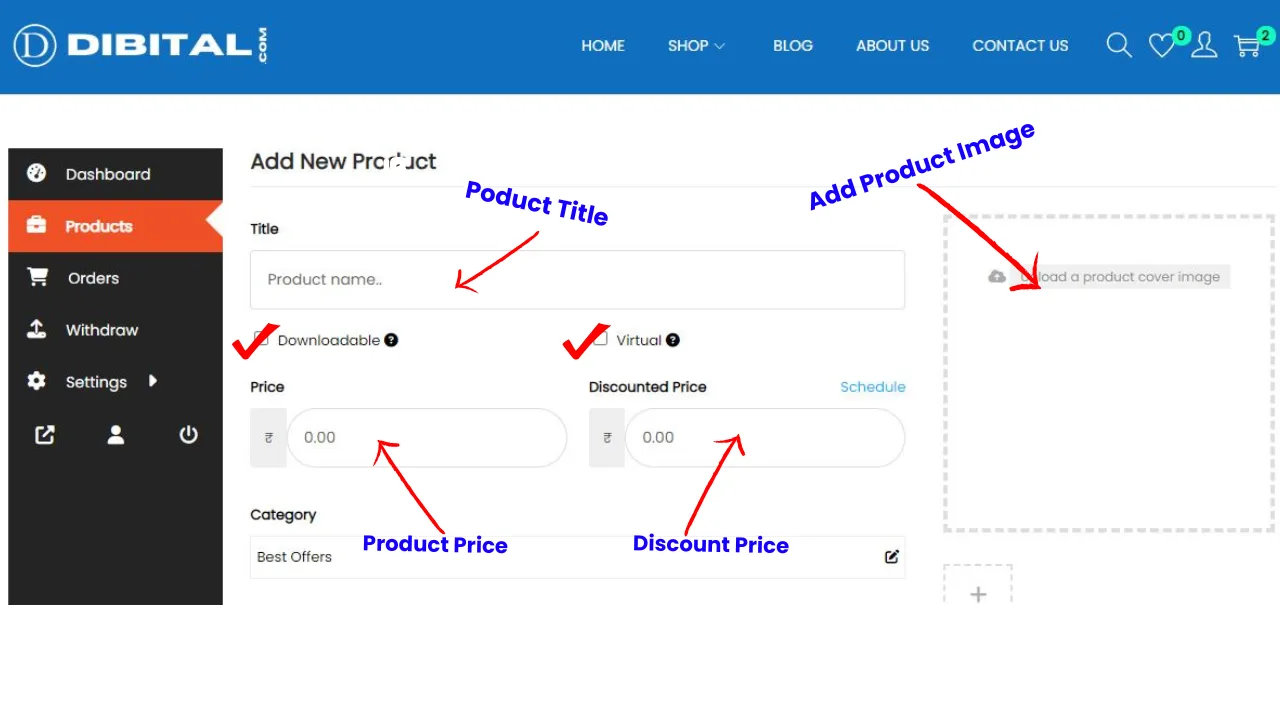
✅ Step 3: Enter Basic Product Details
Product Title: Type the name of your digital product.
Product Image: Upload a clear and relevant image (this will appear on the product page).
You can upload 2 images and 2 downloadable files for each digital products, with extras discarded.
✅ Step 4: Set Product Pricing
Regular Price: Enter the price customers will pay. (Price Put on $ USD)
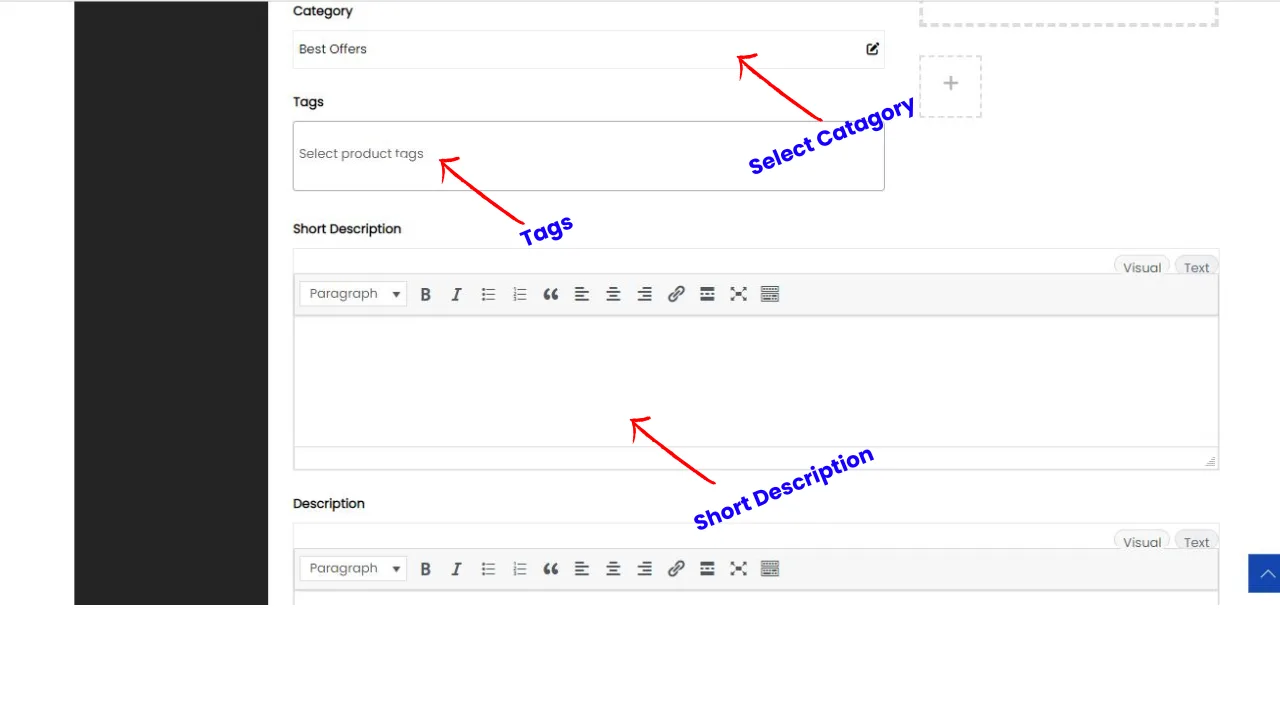
✅ Step 5: Choose Category and Tags
Select the right category for your product so it’s easier to find.
Add relevant tags (e.g., “printable,” “eBook,” “worksheet”).
✅ Step 6: Add Descriptions
Short Description: A brief summary of the product (appears near the product title).
Big Description: Detailed explanation of what the product includes and why it’s useful.
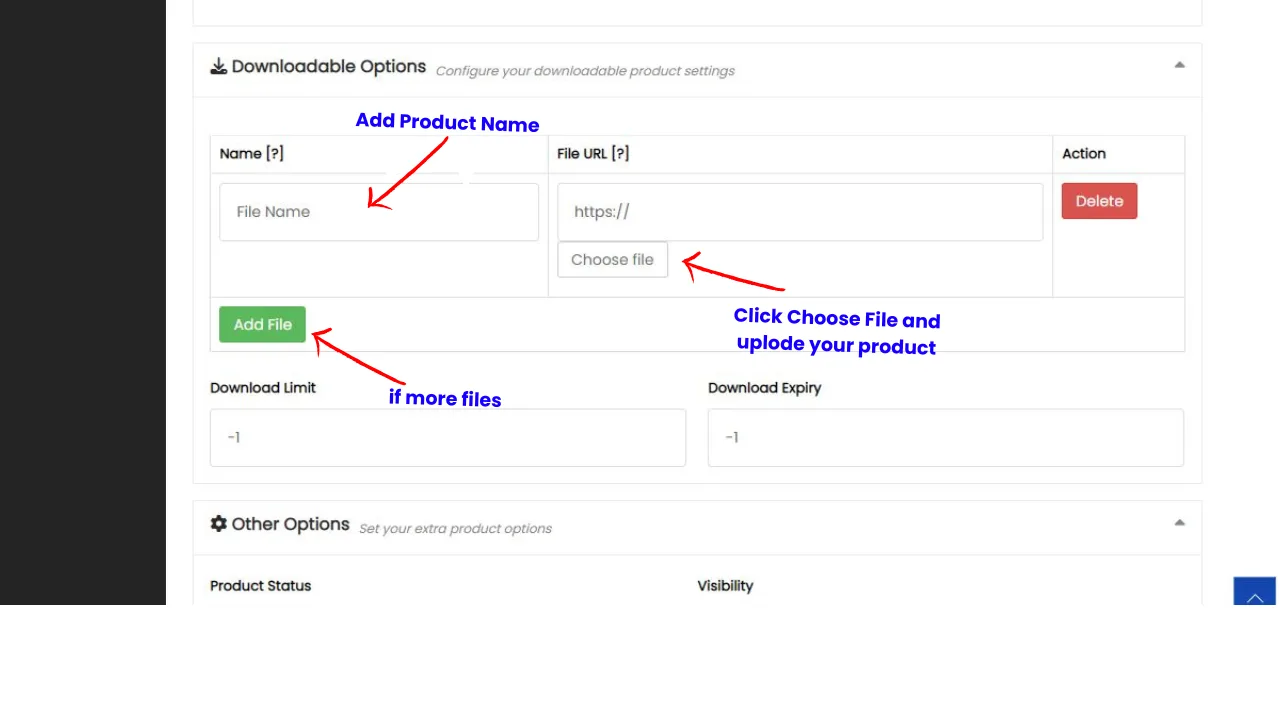
✅ Step 7: Upload the Digital File
Scroll down to the Downloadable Product Section.
Check the box “Downloadable” to enable file upload options.
Click “Add File.”
Enter the file name (e.g., “Summer Workbook PDF”).
Click “Choose File” and upload your product file.
If there are multiple files, click “Add File” again and repeat.
✅ Step 8: Set Download Options
Download Limit: You can set how many times a customer can download the file (leave blank for unlimited).
Download Expiry: Set an expiry date for the download link (leave blank if no expiry).
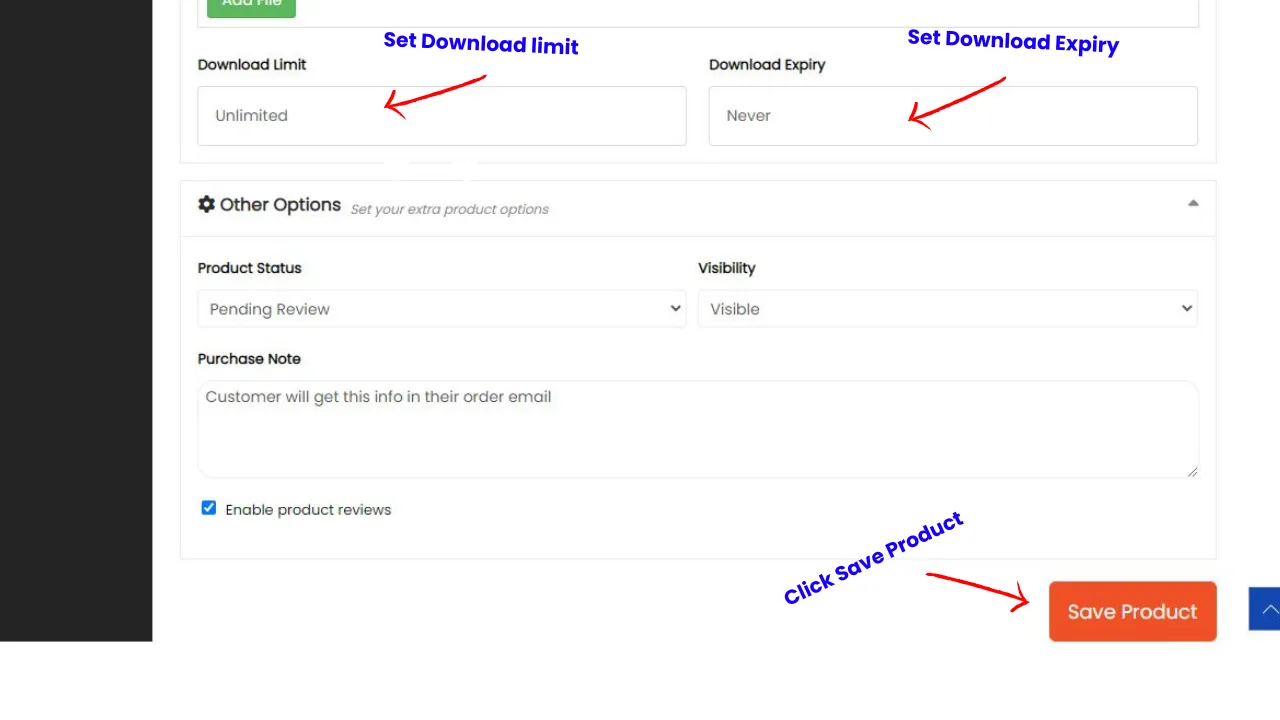
✅ Step 9: Save Your Product
Once everything is filled out, click the “Save Product” button.
🎉 That’s it!
Your digital product is now ready to sell on DIBITAL.